


results for ""
Online shopping
Do I need an account to shop online?
No, you don't need to have an account to place an order with us. Just add your products to your cart and check out!
What payment methods do you accept?
We currently accept the following payment methods:
- Visa
- American Express
- Mastercard
- After Pay
- Zip Pay
- KitchenAid digital gift cards
Please note we are working hard to provide you with more payment options in the near future.
How do I know if my order is processed?
You will be redirected to an Order Confirmation page on your browser, and you will also receive an order confirmation email when your order has been placed.
Another email will be sent when your order has been shipped with your tracking details.
If you are unable to locate your confirmation email in your inbox, please check your junk or spam folder.
Why are my payments not going through
Unfortunately sometimes payments do not process due to a number of potential reasons:
- Order cancellation - orders on occasion have to be cancelled due to a product running out of stock prior to the order processing.
- Card payment issues - you may have an expired card, accidentally entered the wrong card number, security code and/or expiration date. Please double check that all payment details you have entered are all correct. If the problem persists, please contact your card issuer for more information.
If you believe the issue is not due to any of the above reasons, please contact our Customer Service team via the Contact Us form here, and we will be happy to help!
What do I do if a product I want is no longer available online?
If a product is no longer in stock on our website, please contact our Customer Service team via the Contact Us form here to find out if we will be restocking the product.
A product is a different price in-store and online?
We aim to have the same prices online as in store. However, from time to time there may be special online offers that are not available in store and vice versa.
To ensure you don’t miss out on our online special offers and sales, subscribe to our email newsletter here or follow us on Instagram here, so we can keep you updated!
Does KitchenAid offer lay-by?
No, unfortunately we don't offer lay-bys. However, an alternative to shop with payment installments is via Zip Pay or Afterpay. You are able to have your product delivered straight to your door, and make four fortnightly payment installments.
To find out more about Zip Pay, click here.
Does KitchenAid offer gift cards?
We sure do! You can purchase a gift card here.
Where does KitchenAid sell mixers instore?
Some of our approved stockists include David Jones, Myer, Harvey Norman, The Good Guys, Bing Lee, Peters of Kensington, MiniMax and Kitchen Warehouse.
Where can I find the latest promotions and offers?
Can I get my stand mixer engraved in-store?
Engraving is available exclusively on our website at KitchenAid.com.au. Please note we are currently experiencing high demands and delays with engraved mixers - please allow an additional 5 to 7 business days.
Start personalising your mixer here!
Can I get other products other than stand mixers engraved?
You can also personalise our blenders - Personalise here
Start personalising your mixer here!
How do I return a product?
At KitchenAid we want to ensure that our customers are satisfied with their purchase. We are happy to facilitate a return for change of mind, free of charge, provided that the return meets the following guidelines:
- The return is requested within 30 days from the date the product was received. Items sought to be returned for change of mind received outside the 30 day period will not be accepted.
- The item was purchased directly from kitchenaid.com.au.
- The product is in an undamaged and resalable condition with its original packaging intact, including user guides.
- Any item or product packaging that has been damaged cannot be returned.
- You are able to provide proof of purchase.
For more information, visit our returns policy page.
Do you price match?
How does stock sell out when it is available at the time of purchase?
Our system updates stock levels on a daily basis, however, unfortunately there are times when the inventory is low and multiple orders are placed before the system refreshes with the updated stock level. This can cause orders to go through even when the stock is no longer available. If this has occurred, our team will issue a refund via your original payment method.
Shipping and delivery
How long will it take me to receive my order?
Please allow 3 to 5 business days for your order to be dispatched. For engrave dorder allow an additional 5 - 7 business days.
Once your order has been dispatched from our warehouse, please allow the following delivery times based on your location.
- NSW - 3 business days
- VIC - 3 to 4 business days
- QLD - 3 to 4 business days
- SA - 4 to 5 business days
- TAS - 5 to 6 business days
- WA - 7 to 9 business days
- NT - 8 to 10 business days
You can track the status of your order here.
I've ordered multiple items but haven't received the complete order
Please note for orders with multiple items, you may receive multiple deliveries.
Do I need to be home to sign for my order?
We do not leave parcels without a signature. Australia Post will leave a card and the parcel will be taken to a nearby Post Office for your collection.
You'll have 10 business days to collect it before the item is returned to us.
I won't be home to sign for my package. What should I do?
We do not leave parcels without a signature. Australia Post will leave a card and the parcel will be taken to a nearby Post Office for your collection.
You'll have 10 business days to collect it before the item is returned to us.
How much does shipping cost?
Shipping is free for all orders over $99, and for orders under $99 a small $10 fee applies.
Do you offer express postage?
We don't currently offer express postage, however, our team strive to ensure that your product is shipped out to you as soon as possible.
How can I track my order?
We know how exciting is to have a delivery on the way! You can track the status of your order here.
Do you ship overseas?
We don't currently offer this service at KitchenAid.com.au, however KitchenAid products can be found in kitchens (and stores) all around the globe. From Australia to Malaysia, South America to the South of France. Click here for links to the website for your country or region.
Has my order been dispatched yet?
We will send you a confirmation email with a tracking number as soon as your order has been dispatched. You can track the status of your order here.
Is delivery to PO boxes available?
Yep, it sure is!
Can I leave a gift message?
I didn't receive my confirmation email. What do I do?
Once you have received the Order Confirmation screen on your browser, you will be sent a confirmation email shortly after. If you are unable to locate this email in your inbox, please check your junk or spam folder.
Please allow up to 3 hours for your confirmation email to come through. If you have checked all folders and still have not received your order confirmation email, please contact us here.
I have placed the wrong address on my order. What do I do?
We are unable to amend or cancel an order once it has been placed on the website.
I received the wrong order. What do I do?
We're sorry to hear that you have received the incorrect order. Please contact us immediately on 1800 990 990 and we will have this corrected for you.
Product support
General
Where can I find a user-guide for my product?
Your user guide is located in the box that your product arrived in.
Can't find it? You can also view our user guides on the product pages on our website.
How do I register my product?
Please click here to register your product.
Please note you only need to register your product if you have purchased the item from one of our trade/retail partners. Any products purchased directly via our website will be automatically registered during the online ordering process.
How do I find out the warranty policy for a product?
Where can I buy spare parts for my product?
You can purchase spare parts for your products by contacting our Customer Service team by calling 1800 990 990 or by completing the Contact Us form located here.
Where can I get my product repaired?
To find your nearest service centre, please visit our Service Centre & Stockists page here.
Where can I find recipes that I can make with my product?
We have lots of delicious recipes available here. You can search by ingredient, occasion and product. Be sure to tag us in photos of your creations on Instagram!
For cook processor recipes please click here to download your very own ebook!
Is there anywhere I can watch videos on how to use my product?
Absolutely! You can view our how to videos here.
How can I hear if there has been any product recalls?
Product recall information is available here.
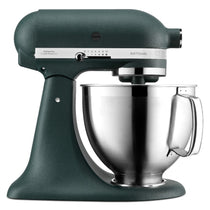
Stand mixers
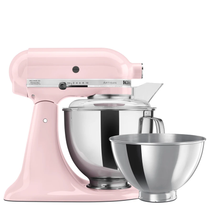
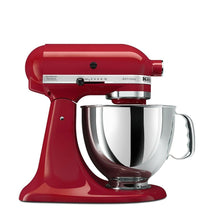
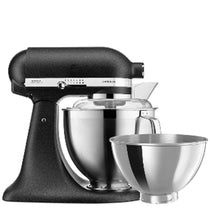
What is the difference between the tilt-head stand mixer models?
We're so excited you're looking at one of our iconic stand mixers - we've been making and baking for over 100 years!
We understand the different names and product codes may be confusing, so we have listed the differences between our tilt-head stand mixers below to get you on your way!

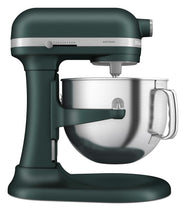
4.8L Artisan Tilt-Head Stand Mixer 2025 Colour of the Year - Butter
- 4.8L brushed stainless steel bowl with comforthandle
- Additional 2.8L stainless steel bowl
- 6 wire whip, flex edge beater, dough hook, pastry beater and pouring shield
- Muted yellow hue
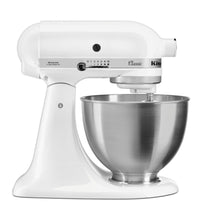
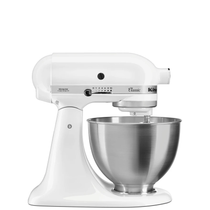
4.3L Classic Stand Mixer
- 4.3L handle less stainless steel bowl
- Wire whisk, flat beater and dough hook
- Available in white and onyx black
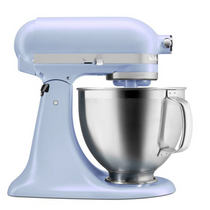
4.8L Artisan Tilt-Head Stand Mixer 2024 Colour of the Year - Blue Salt
- 4.8L brushed stainless steel bowl with comforthandle
- Additional 2.8L stainless steel bowl
- 6 wire whip, flex edge beater, dough hook, pastry beater and pouring shield
- Soft blue shade
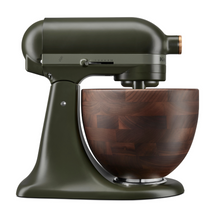
4.7L Artisan Stand Mixer Evergreen Design Series 2024
- 4.8L exclusive wooden bowl
- Wire whisk, flat beater and dough hook
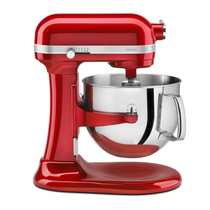
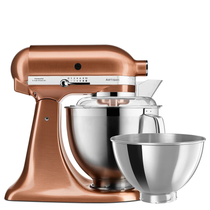
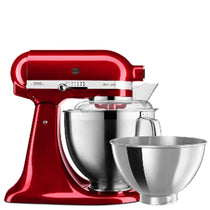
4.8L Artisan Tilt-Head Stand Mixer
- 4.8L brushed stainless steel bowl with ergonomic handle
- 6 wire whip, flat beater and dough hook
- 12 colours in satin, gloss and matte finishes
4.8L Artisan Tilt-Head Stand Mixer
- 4.8L brushed stainless steel bowl with ergonomic handle
- Additional 2.8L stainless steel bowl
- 6 wire whip, flex edge beater, dough hook and pastry beater
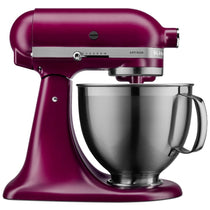
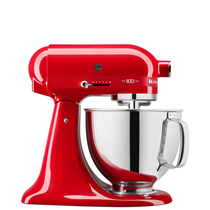
4.8L Artisan Tilt-Head Stand Mixer 2022 Colour of the Year - Beetroot
- 4.8L brushed stainless steel bowl with comforthandle
- Additional 2.8L stainless steel bowl
- 6 wire whip, flex edge beater, dough hook, pastry beater and pouring shield
- Rich magenta colour with an engergising and uplifting hue
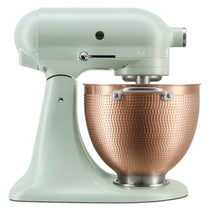
4.7L Artisan Stand Mixer Blossom Design Series 2022
- 4.7L hammered copper bowl
- Stainless steel flat beater, dough hook, wire whisk, pastry beater
- Iconic pettaled hub cover
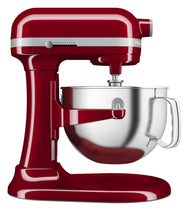
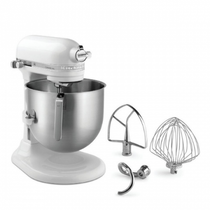
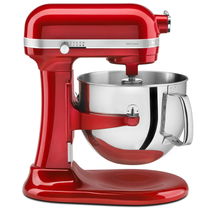
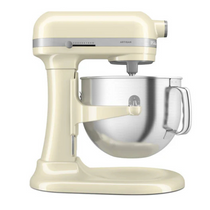
What is the difference between the bowl-lift stand mixer models?
Our bowl-lift stand mixers are designed to handle heavy mixtures easily for when you want to make larger batches of yummy goodness!
5.6L Bowl-Lift Stand Mixer KSM60
- 5.6L stainless steel bowl with handle
- Pouring shield
- Wire whisk
- Flat beater
- Dough hook
6.6L Bowl-Lift Stand Mixer KSM70
- 6.6L stainless steel bowl with handle
- Pouring shield
- Stainless steel whisk
- Stainless steel flat beater
- Stainless steel dough hook
- Double flex edge beater
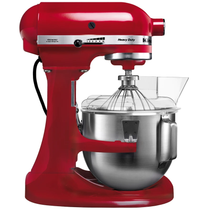
7.6L Commercial Bowl-Lift Stand Mixer KSMC895
- 7.6L stainless steel bowl with handle
- Stainless steel bowl guard
- Stainless steel elliptical whisk
- Flat beater
- Dough hook
What is Original Planetary Mixing Action?
Original planetary mixing action describes the way in which the flat beater moves around the bowl. During operation, the beater moves around the stationary bowl, at the same time turning in the opposite direction on its own axis. Original planetary mixing action ensures thorough ingredient incorporation. The beater, dough hook or wire whisk rotates around the bowl, giving incredible bowl coverage for fast and complete mixing. Your KitchenAid Mixer will mix faster and more thoroughly than most other electric mixers. Please note it's recommended that the mixing time in most recipes be adjusted to avoid overbeating.
In short, it gives you the best and most thorough mixing action! What else is better than that!
Where are our stand mixers manufactured?
Our iconic stand mixers have been manufactured in Greenville, Ohio USA since the end of the Second World War.
What is the attachment hub?
The KitchenAid Stand Mixer is more than just a mixer. The trademark hub allows for the attachment of over a dozen accessories which will turn your mixer into a pasta machine, citrus juicer, meat grinder, ice cream machine, vegetable slicer, sausage maker and so much more. View the full range of KitchenAid Stand Mixer attachments here. Enjoy your next culinary adventure!
What are the standard inclusions with a stand mixer?
Standard inclusions vary between our range of stand mixers. Please see the table below for more details around each model and their inclusions.
4.3L Classic Stand Mixer
- 4.3L handleless stainless steel bowl
- Wire whisk, flat beater and dough hook
- Available in white and onyx black
4.8L Artisan Tilt-Head Stand Mixer
- FREE engraving worth $49.95
- 4.8L stainless steel bowl
- Wire whisk, flat beater and dough hook
4.8L Artisan Tilt-Head Stand Mixer (Two Bowls)
- FREE engraving worth $49.95
- 4.8L stainless steel bowl
- Wire whisk, flat beater and dough hook
- Additional 2.8L stainless steel bowl
- Over 15 colours
- Gloss and matte finishes
4.8L Artisan Tilt-Head Stand Mixer with Two Bowls (Platinum Colours)
- FREE engraving worth $49.95
- 4.8L brushed stainless steel bowl
- Wire whisk, flat beater and dough hook
- Additional 2.8L stainless steel bowl
- Additional flex edge beater
- Additional pouring shield
- Platinum colours and finishes
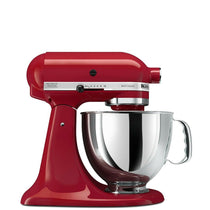
4.8L Limited Edition Tilt-Head Stand Mixer Queen of Hearts
- 4.8L stainless steel bowl
- Accessories in a beautifully crafted stainless steel - wire whisk, flat beater and dough hook
- Additional 2.8L stainless steel bowl
- Premium chrome hub and accents
- Limited edition ‘Passion Red’ colour
4.7L Heavy Duty Bowl-Lift Stand Mixer
- 4.8L stainless steel satin finish bowl with handle
- Pouring shield
- Bowl cover
- Wire whisk
- Flat beater
- Dough hook
6.9L Heavy Duty Bowl-Lift Stand Mixer
- 6.9L stainless steel bowl with handle
- Pouring shield
- Stainless steel 11-wire elliptical whisk
- Stainless steel flat beater
- Stainless steel spiral power knead dough hook
6.9L Pro Line® Series Bowl-Lift Stand Mixer
- 6.9L stainless steel bowl with handle
- Pouring shield
- Stainless steel 11-wire elliptical whisk
- Coated metal beater
- Coated metal spiral power knead dough hook
What are the different uses for the flat beater, flex edge beater, wire whisk and dough hook?
The Flat Beater is the ‘wooden spoon’ of the KitchenAid Stand Mixer. It is used for any gentle folding, slow and fast mixing, cutting/rubbing in, creaming or beating, such as creaming butter and sugar, creaming egg yolks and sugar, combining flour mixtures, combining all-in-one cake and batters or gentle folding, ‘rubbing in’ shortening for pastry, beating of soft fruits and vegetables (rough dip or sauces) and combining dough/pasta mixtures before kneading. This is available with all stand mixer models.
The Flex Edge Beater is a flat beater and spatula combined. It is used for creaming and beating; its action mixes/creams and wipes the sides of the bowl (i.e. creaming butter and sugar, combining cake and batter mixtures). Available with KSM177.
The Wire Whisk is used for aeration and is suitable for whipping mixtures where aeration is required (i.e. egg whites for delicious and fluffy meringues and mousse mixtures, creaming of egg yolk and sugar mixtures, whipping cream). It is also suitable for ‘sifting’ flour and icing sugar. Available with all stand mixer models.
The Dough Hook is for mixing and kneading yeast doughs. Great for heavy mixtures such as bread, pizza and pasta dough. Designed for speed 1 and 2 only. Available with all stand mixer models.
If you're in need of one of these great accessories, you can buy these separately here.
What is the purpose of the pouring shield?
The pouring shield minimises splash and flour puff as well as making adding liquids easy through the use of the chute. Please note the pouring shield is not suitable for the glass bowl.
Click here to find our more about our pouring shield or to shop now!
What do I do if I have lost the stainless steel KitchenAid hub cover/attachment screw for my Stand Mixer?
If you have misplaced your hub cover (badge) on your KitchenAid Stand Mixer, or the attachment screw (thumb screw) that holds it in place, please call our Customer Service team on 1800 990 990 to order a replacement.
Why are my ingredients not fully mixing
This might be due to the height of your beater to your bowl!
If the beater is too high, it cannot reach and incorporate the ingredients.
If the beater is too low, it can hit the bottom of the bowl and the white coating can chip off the bottom of your beater.
The clearance between your beater and bowl is adjusted at our factory, but can change over time with use and in transit, but can easily be raised or lowered!
To adjust your beater height, tilt the mixer head down, slide an envelope or folded piece of paper between the beater and the bowl. The beater should not be touching the bottom of the bowl. The correct clearance is the thickness of the two pieces of paper. Lift the head up, you should see a rectangle hole with a flat head screw. Turn the screw counter clockwise or left to raise the beater. Turn the screw clockwise or right to lower the beater. Each time only turn the screw about a ¼ turn at a time and test again with the paper. Throughout the life of the mixer, the height may need to be adjusted as it may alter with normal use of the mixer.
How do I adjust the beater to bowl clearance?
Tilt the mixer head down, slide an envelope or folded piece of paper between the beater and the bowl. The beater should not be touching the bottom of the bowl. The correct clearance is the thickness of the two pieces of paper. Lift the head up, you should see a rectangle hole with a flat head screw. Turn the screw counter clockwise or left to raise the beater. Turn the screw clockwise or right to lower the beater. Each time only turn the screw about a ¼ turn at a time and test again with the paper. Throughout the life of the mixer, the height may need to be adjusted as it may alter with normal use of the mixer.
What accessories and attachments can go in the dishwasher?
All the bowls are dishwasher safe. All of the attachments are too, except for the wire whisk. The wire whisk must be hand washed to avoid damage to the wires, and so that the alloy base does not blacken, pit or go powdery.
How heavy are the ceramic bowls?
Our beautiful ceramic bowls are the perfect addition to any mixer to make it truly yours! Our ceramic bowls weigh roughly 4.5kgs
What are the different finishes of the mixers?
Our mixers are available in a variety of different finishes to suit your style
Gloss for a classic look
Available in selected shades of
- KSM45
- KSM150
- KSM160
- KSM180
- KSM7590
- KPM5
Premium gloss, for a high shine look
Available in selected shades of
- KSM177
- KSM7581

Matte, zero shine
Available in selected shades of
- KSM160

Metallic, polished metal for an edgy style
Available in selected shades of
- KSM177
Cast Iron, a matte textured finish
Available in
- KSM177 Cast Iron Black
Why is my stand mixer is missing a part where my attachments attach?
From September 2016, the international Classic Stand Mixer no longer has the agitator cup where the beaters, dough hook and whisk attach to the Stand Mixer. The part was originally installed during the initial international Stand Mixer launch, however. KitchenAid have since learned that it is not needed and the change makes the product easier to use and clean.
What speeds are suited to what ingredients?
Speed 1 - Stir for starting all mixing procedures, slow stirring, combining and mashing. Use to add flour and dry ingredients to batter, and to add liquids to dry ingredients. Do not use Speed 1 to mix or knead yeast doughs.
Speed 2 - Slow mixing, kneading for slow mixing, mashing, faster stirring. Use to mix and knead yeast doughs, heavy batters, and candies: start mashing potatoes or other vegetables: cut shortening into flour: mix thin or splashy batters.
Speed 4 - Mixing, beating for mixing semi-heavy batter, such as cookies. Use to combine sugar and shortening, and to add sugar to egg whites for meringues. Medium speed for cake mixes. Use with: Food Grinder, Rotor Slicer/Shredder, Pasta Roller, and Fruit/Vegetable Strainer.
Speed 6 - Beating, creaming for medium-fast beating (creaming) or whipping. Use to finish mixing cakes, doughnuts and other batters. High speed for cake mixes. Use with Citrus Juicer attachment.
Speed 8 - Fast beating, Whipping for whipping cream, egg whites and boiled frostings.
Speed 10 - Fast whipping for whipping small amounts of cream or egg whites and for final whipping of mashed potatoes. Use with Juicer Pasta Maker and Grain Mill attachments. NOTE: Will not maintain fast speeds under heavy loads.
Why is the white coating on the beater chipping?
Oh no, lets see why this is happening!
Is the chip on the side of the beater? Hitting the flat beater on the side of the bowl to release ingredients can weaken the coating on the side of the beater, causing it to chip. It is essential to use a spatula to remove ingredients from the flat beater.
Is the chip on the bottom of the beater? If the bottom of your beater is chipping, it may be too low and is hitting the bottom of the bowl—you may need to adjust your mixer. Your mixer is adjusted for optimum mixing at the factory, but through time and use, it can change, and it should be readjusted.
Is the chip on the top of the beater? It is important to take care when attaching and removing the flat beater on the beater shaft. Using excessive force can cause chipping in that area. Make sure to locate and align the "keyhole" on the bottom of the beater with the notch on the beater shaft when attaching prior to twisting in place.
How do I restore a warped Flex Edge beater?
No one wants a misshaped beater! Unfortunately if the Flex Edge beater is placed close to other items in the dishwasher, the silicone edge can become warped or misshapen. The flexible edge can be restored by running it through the dishwasher again and making sure that it does not touch other items. The heat of the dishwasher will soften it and allow it to return to its original shape.
Why is the beater hitting the bottom of the bowl?
If your flat beater is hitting the bottom of the bowl, it's possible that your beater is too low and needs to be raised. Your mixer is adjusted for optimum mixing at the factory, but through time and use, it can change, and it should be readjusted.
If the beater is too low and pushes into the bowl, it can cause the bowl to become scratched, and the head of the mixer may bounce up and down.
If your flat beater is white, it's possible that the white coating may chip or become worn on the bottom from hitting the bowl and should be replaced.
Its simple to adjust the beater to bowl clearance, just tilt the mixer head down, slide an envelope or folded piece of paper between the beater and the bowl. The beater should not be touching the bottom of the bowl. The correct clearance is the thickness of the two pieces of paper. Lift the head up, you should see a rectangle hole with a flat head screw. Turn the screw counter clockwise or left to raise the beater. Turn the screw clockwise or right to lower the beater. Each time only turn the screw about a ¼ turn at a time and test again with the paper. Throughout the life of the mixer, the height may need to be adjusted as it may alter with normal use of the mixer.
Why is the bowl not secure in the base plate?
There could be a few reasons for this, lets check them out!
Is the bowl worn?
Check the base of the bowl to see if the "bumps" all seem intact or if any of them are pushed in. If the bumps are not intact, the bowl will need to be replaced.
Is the base plate worn?
Check the base plate to see if the "bumps" that lock into the bowl base are intact or if they look worn. If the bumps are not intact, the base plate will need to be replaced.
Are you using the correct speed?
Are you using speed two only for making bread? If you knead bread at a higher speed, the force and weight of the dough can cause the bowl to unlock.
Does the beater need to be adjusted?
As part of routine maintenance, it is essential to check that the beater is neither too high nor too low.
If it is too low, it can press into the bowl, and cause undue pressure on the bowl, which can cause the bowl to unlock.
If it is too high, the lock on a tilt head mixer may not fully lock, and the head may wobble.
Why is my stainless steel bowl oxidized?
While stainless steel is rust-resistant, it isn't 100% rust proof. Several things can cause rust on even the highest quality stainless steel.
Unlike carbon steel, stainless steel is an iron alloy that contains a relatively high percentage of chromium. It's the inclusion of chromium that gives stainless steel its rust resistance. The chromium in stainless steel reacts with oxygen (in the air or water) to form a very thin, transparent, passive film (chromium oxide) over the surface of the steel, which limits further oxidation (rust).
This passive film is formed (and repaired) very rapidly, so you don't need to worry about scraping or scrubbing it off. But some things can penetrate this film and cause rust if left in contact with stainless steel.
How do you prevent rust?
Frequent washing is an essential step, but there are a few other tips and tricks to keep in mind.
Some city water sources contain high levels of chlorine, which can penetrate the protective film on stainless steel and cause rusting. Well water can also include a bacteria that is capable of producing rust in stainless steel.
Avoid Scratches
Small scratches are mostly cosmetic, but deeper scratches can be difficult to keep clean. Avoid scratches by not using metal utensils in your bowls (or using them very gently) and staying away from highly abrasive pads.
Use the Correct Soap
Use only mild detergents and steer clear of harsh chemicals or antibacterial cleaning products. Some harsh chemicals and antibacterial soaps can cause rusting in stainless steel. Halogen salts (chlorine, fluorine, bromine, iodine), some antibacterial agents (ones that contain a chemical called Triclosan), and bleach (sodium hypochlorite) or bleach-containing cleaning products may cause rust in stainless steel. Check your soap and make sure it doesn't contain any of these materials.
Avoid Metal on Metal Contact
Avoid metal cleaning pads (like steel wool) and avoid metal utensils. Steel wool is made from carbon steel and rusts readily. Using it on a stainless steel material can deposit what is referred to as "free iron", which isn't protected by chromium, and can quickly lead to rusting. Sustained contact between stainless steel and some other types of metal can set-up a process called Galvanic Corrosion. A wet environment is far more likely to lead to rusting than a drier climate.
How to Remove Rust and Stains?
1. Mix some baking soda with vinegar (apple cider or white vinegar) until you reach the consistency of a paste.
2. Spread the paste over the surface of the stainless steel
3. Allow it to sit for about 10 minutes (up to a few hours if you have very stubborn rust).
4. Scrub the paste over the stainless steel surface with a scratch-free scrubbing pad using a circular motion.
5. Rinse the bowl thoroughly with warm water, then perform a regular soap and water wash followed by a hand drying.
This more in-depth cleaning process can be used as needed (when stains or rust appear) or on a weekly/monthly basis as a preventative action.
Why is my bread not rising when I use my standmixer?
Bring on the fresh sourdough!
Firstly check is the yeast fresh?
Yeast has an expiration date, and after that date will not be as effective. Yeast should be stored in a cool, dry place. Yeast may have been dissolved in too hot of water or the liquid ingredients in the recipe may be too hot, causing the yeast to die. Also, check to make sure the temperature of the ingredients; if they are too cold, it could cause some of the yeast to die.
Was the dough kneaded properly?
Dough may not have been kneaded adequately. Kneading "exercises" the gluten in the bread and gives it the elasticity to hold in the air bubbles produced by the yeast. It is these air bubbles that cause the dough to expand and rise.
Was the dough given enough time to rise?
Insufficient time may have been allowed for the dough to rise correctly.
Where was the dough placed to rise?
Dough may have been placed in too hot of place for rising. The optimal temperature for the rising dough is from 21º to 32º F. At higher temperatures; the yeast will begin to die.
What type of flour was used?
If specialty grains are being used in dough, the dough will not rise as much because these grains have a lower percentage of gluten to hold in the air bubbles that cause the bread to expand. If a sourdough starter is being used, it may not be active. Sourdough starter must be fed at proper intervals and kept at the correct temperature to keep the yeast cultures alive and active.
Why are my egg whites not whipping?
Are you using the correct quantity of egg whites?
It is recommended to have two or more egg whites in the bowl when whipping. If your eggs are small, or you only have two eggs, it helps to start with the flat beater to whip the eggs on speed ten until frothy. When frothy, there is sufficient volume to then switch to the wire whip to finish.
Additional Suggestions:
- New, room temperature egg whites will whip up faster than old, cold eggs.
- Make sure the bowl you whip the egg whites in is free from any greasy residue.
- Make sure that no egg yolk is in with the egg whites. Egg yolks are very high in fat and will hinder the whipping process.
Why is oil leaking from my stand mixer?
Throughout the lifespan of a KitchenAid Stand Mixer, you may occasionally notice the following:
- A few drops of oil in the bottom of the bowl
- Oil dripping off the beater shaft
- Oil leaking out of the lock lever or Speed Control slots on a mixer that has been turned on its side during shipping or storage
The reason for this is that the mixer is packed with enough solid grease to last the lifetime of the mixer. When the mixer is used, the grease is distributed around the gears to lubricate them. Over time some oil can separate out of the solid grease and will naturally settle to the lowest point in the motor-head which is just over the beater shaft if the mixer is upright or the Speed Control or lock lever slots if the mixer is on its side. This is more likely to happen in warm weather and if the mixer is not used very often. Using a mixer regularly may prevent this from occurring.
For tips on how to prevent oil from leaking from a KitchenAid Stand Mixer, do the following:
- Turn the mixer on without any ingredients in the bowl periodically to help prevent this.
- If you have not used your mixer for awhile, you can turn it to speed 10 and let the unit run for 2 minutes, prior to use. At the end of 2 minutes, turn off the mixer and wipe any excess oil from around the planetary action.
- Some oil could splatter and get on clothing during this process, so if you have a pouring shield, it may be helpful to have it attached to the bowl to try to reduce the likelihood of this happening.
- Overusing a mixer, and not allowing it to cool completely between uses, can also cause this to occur.
If none of these methods work, the only way to stop this completely is to take the mixer to a service centre. A servicer will take out all old grease, repack with new grease and replace the gasket.
Notes:
- The grease is food grade and is approved for incidental contact with food prepared in the mixer, although it may discolor light-colored frostings or mashed potatoes.
- Once the mixer has started to leak oil, the only way to stop this completely is to take the mixer to an service centre, where the servicer will take out all old grease, repack with new grease and replace the gasket.
- This is entirely up to the consumer – oil leakage will not harm the mixer.
- It is not necessary to add oil to the mixer as regular maintenance
- Unless the mixer has lost a fairly large amount of oil this is most likely not a concern.
- If the mixer sounds "normal", and is not grinding, it can continue to be used.
How often should I use my stand mixer?
We recommend using your stand mixer daily ;) No really, we do hope your using your mixer as often as possible but if your stand mixer is not frequently in use, we recommend running the machine for 5 minutes a day, twice a month to ensure the machine will not seize.
What do I do if the beater is stuck on the beater shaft?
Is there food stuck in the opening?
Food particles can build up inside the beater cavity that fastens onto the beater shaft causing it to be challenging to remove or challenging to put on the beater shaft. If washing the beater in the dishwasher, make sure to insert it point down so that food particles cannot go into the opening.
Beaters should not be stored on your mixer when not in use because ingredients can get into the beater cavity during washing and harden, causing the beater to be challenging to remove.
Tips for removing stuck beater
There are a couple of tricks that can help remove a stuck beater.
1. Use a warm compress
- Compress a wet, warm towel around the beater shaft for 10 minutes.
- Re-warm it after the 10 minutes, put it on again, and let it sit for 1 -2 more minutes. This will rewarm the aluminium, causing it to expand. After this time, try to wiggle and remove the beater.
2. Mineral Oil
If the beater does not come off with the hot compress, try applying a small amount of mineral oil to the beater shaft above the beater and in the slot where the beater attaches to the beater shaft pin.
- Allow the oil to sit on the beater shaft for several minutes, and remove the beater.
If you don't have any mineral oil, you may use a vegetable oil cooking spray instead. If you use vegetable oil, make sure to clean the beater shaft very thoroughly after the beater is removed because it can become very sticky over time.
Once removed
Once the beater is off, soak the beater in hot soapy water and clean out the beater cavity thoroughly. Use a wooden skewer to remove any build-up of food particles or oxidation residue.
You may also want to apply a little mineral oil to the beater cavity before putting it back on the beater shaft.
What type of motor is included in the KSM60 & KSM70 Bowl-Lift Stand Mixer?
The updated KSM60 and KSM70 stand mixers feature a powerful universal motor driven by AC (alternating current) that offers 1.5x the power in the bowl than model 5KMP5, peak HP in the bowl.
How powerful are the KSM60 and KSM70 bowl-lift stand mixers?
The KSM60 and KSM70 bowl-lift mixers carry a 375 watt power rating.
Please visit our comparison page for more information on product specs.
How does KitchenAid measure power?
KitchenAid measures power in the bowl, to deliver capacity and performance where you need it most. By focusing on practical user cases (ex bread dough, cookies). KitchenAid allows each consumer to make an informed decision on which mixer is right for them.
KitchenAid measures power consumed by mixers as wattage. This is done in compliance with standards published by Underwriters Laboratory (UL) and according to representative loads from those standards. The wattage measurement is not intended to inform customers on loading of their home electrical circuits and is not intended to describe power output or performance of the product under heavy loads.
Is ½ speed a new speed?
½ speed is an entirely new speed unique to the bowl-lift stand mixer collection (models KSM60 & KSM70). ½ speed is twice as low as speed 1 and brings the total number or speeds to 11.
Designed for gently mixing, ½ speed gently adds delicate ingredients, like blueberries and egg whites, into recipes without overbeating.
What is the maximum dough capacity for each stand mixer?
Artisan Bowl-Lift Stand Mixer KSM70
Cookie dough for up to 13 dozen cookies, on speed 2
Artisan Tilt-Head Stand Mixer KSM195
Cookie dough for up to 9 dozen cookies, on speed 2
Tilt-Head Stand Mixer KSM180
Cookie dough for up to 9 dozen cookies, on speed 3
Classic Tilt-Head Stand Mixer KSM45
Cookie dough for up to 8 dozen cookies, on speed 2
Artisan Bowl-Lift Stand Mixer KSM60
Cookie dough for up to 13 dozen cookies, on speed 2
Tilt-Head Stand Mixer KSM192
Cookie dough for up to 9 dozen cookies, on speed 2
Stand mixer attachments
Sifter + scale attachment
Why has an Err message appeared on the scale of my Sifter + Scale attachment?
Your weighing some super heavy ingredients and the scale has exceeded its weight limit. Remove ingredients from hopper, and try again with a smaller amount.
Why has an Err1 message appeared on the scale of my Sifter + Scale attachment?
Remove ingredients and turn off power as it looks like we have a Tare error. Then, turn power back on and voila, fixed!
How do I clean my sifter + scale attachment?
Our sifter + scale doesn't enjoy swimming so please do not immerse the scale or sifter housing in water or other liquid. Wipe clean with a warm, damp cloth, and dry thoroughly with a soft cloth before re-use or storing. The remaining parts are dishwasher-safe, top rack only.
Are all parts of the sifter + scale attachment dishwasher safe?
No, please do not place the scale of the sifter housing in the dishwasher, this could cause damage to the attachment :(
Metal food grinder attachment
Can I put the metal food grinder in the dishwasher?
Its hand wash only for this baby! The metal food grinder is made from aluminium and doesn't like the dishwasher :)
Can I get sausage stuffing tubes for the metal food grinder?
Homemade sausages, yes please! The Metal Food Grinder comes with 2 sausage stuffing tubes, woo hoo!
Can I put other ingredients in the food grinder other than meat?
Yep, our fabulous food grinder does more than grind meat, its suitable for a wide variety of ingredients such as fruits, vegetables, breads, cheeses herbs, biscuits etc.
Ice cream bowl attachment
How long does my ice cream bowl have to be in the freezer before I can make ice cream?
We understand you want your ice cream NOW!! However the ice cream bowl needs to be frozen for at least 12 hours for best results. It will be worth the wait we promise!
How do I clean the ice cream bowl?
Step 1. Eat all the ice cream!
Step 2. Make sure you allow the freeze bowl to reach room temperature before attempting to clean it.
Step 3. Wash the freeze bowl in warm water with mild detergent.
Step 4.Thoroughly dry the freeze bowl before storing in freezer ready for another delicious batch tomorrow!
IMPORTANT: Never wash the freeze bowl in the dishwasher. Hand-wash with warm water and mild detergent only. The drive assembly and dasher are dishwasher safe.
Pasta roller attachment
How do I clean the pasta rollers?
So you are stuffed from your Italian feast, now its time to clean up!
Let the rollers air dry for 1 hour, then remove any dried pasta with the cleaning brush provided. Polish with a soft dry cloth.
Please please please never immerse the rollers in water and do not wash in the dishwasher.
Spiralizer attachment
Can I put the blades of the spiralizer in the dishwasher?
All zoodled out? Lets get our clean on! Whilst we recommend to hand wash in warm soapy the blades and accessories can be placed in the dishwasher on the topshelf. Its important to never immerse the main body of the attachment in water.
Do I have to peel my ingredients first?
Oh no, who has time for peeling? The spiralizer comes with a peeler so no hard work for you, you can thank us later!
Vegetable sheet cutter attachment
What foods are suitable for the sheet cutter?
Firm and thick fruits and vegetables are recommended such as potato, sweet potato, beetroot, apple, zucchini, carrot. Hello vegetarian lasagne, yum!
What size blades come with the sheet cutter?
We know you like to mix it up so the sheet cutter comes with two blades, 1.3mm and 1.8mm.
Can i put the blades of the sheet cutter in the dishwasher?
Whilst our recommendation is to always handwash, its ok for the blades and accessories to be placed in the dishwasher on the topshelf. However never put the main body of the attachment in the dishwahsre or immerse in water!
Food processor attachment
Does the food processor attachment have a multi purpose blade like a food processor?
No, the food processor attachment comes with dicing, slicing, julienne and grating discs only. Perfect for soft and hard fruits, cheese and cooked meats.
Ravioli cutter attachment
What size are the ravioli pockets on the raviolli cutter?
The ravioli cutter pockets are 4 cm, perfect pockets of deliciousness!
How do I wash the ravioli cutter?
Cleaning this attachment couldn't be easier!
Firstly dust the attachment with flour and use the cleaning brush to remove dried dough.
Then remove the hopper and snap open the thin white plastic guides/levers at the bottom of the attachment for easy access to the rollers.
Lastly wash the Ravioli Maker Attachment in warm soapy water then rinse with clean water.
All clean and ready for a new batch.
Pasta press attachment
What pasta discs come with the pasta press?
We know every family member prefers a different pasta shape, so there are 6 pasta plates included
- Spaghetti
- Bucatini
- Rigatoni
- Fusilli
- Large Macaroni
- Small Macaroni
Phew that list made us hungry!
How do I clean the pasta press plates?
Super simple, just leave the pasta plates to dry overnight, then separate the plates. You can then use a toothpick to push out the dried pasta.
Juicer and sauce attachment
Is the Juicer attachment a cold press juicer?
No, the juicer is a 2 stage slow juicer.
Why won't the juicing bowl sit on the main body of the juicer and sauce attachment?
Make sure the rubber gasket is secured in place behind the pulp chute correctly. Bring on the juice!
What parts can go in the dishwasher?
We know you love your dishwasher but please never wash or immerse the drive assembly in water, all other parts are top rack dishwasher safe.
Fresh prep slicer shredder attachment
Are the blade drums adjustable?
The blade drums aren't adjustable, but with 3 to choose from we're sure you'll find a favourite!
What size are the blade drums?
The Slicing drum is 3mm thick the coarse grating drum is 6mm wide and the medium drum grating drum is 4mm wide.
What do I use the 3 different blades for?
The slicing blade quickly slices vegetables such as cucumbers, carrots, and celery. The medium shredding blade is perfect for freshly shredding cheese and firmer vegetables such as carrots. The coarse shredding blade is ideal for shredding ingredients like cabbage for coleslaw or potatoes for hash browns. Yummy!
What speed should I use on the Stand Mixer?
Speed 4 is recommended. If the Stand Mixer is run at a faster speed the inside of the unit could fill up with sliced/shredded ingredients too quickly and not fall on the plate or bowl as intended. We wouldn't want any shredded goodness going astray!
Citrus juicer attachment
What can I juice with the citrus juicer attachment?
Citrus fruit such as oranges, lemons, limes, grapefruit. Your morning juice will never be the same again!
Can I juice other ingredients such as carrot and apple?
No, this juicer is not an extractor, it is a press juicer only. For an extractor juice experience, you may like our juicer and saucer attachment.
Grain mill attachment
What grains can I grind?
The grain mill is designed to mill low-moisture, non-oily grains such as wheat, corn, rye, oats, rice, buckwheat, barley, and millet.
What grains are not suitable to grind?
As tempting as it is please don't grind peanuts, coffee beans, soybeans, or sunflower seeds with the grain mill; their high oil or high-moisture contents can damage the grinding mechanism and we wouldn't want that to happen!
How do I clean the grain mill?
First things first, please do not wash the grain mill or any of its parts in a dishwasher.
Clean the burrs and all other parts with the provided brush. The Grain Mill Attachment does not necessarily need to be cleaned after every use, but should be brushed when changing types of grains. If needed, a toothpick may be used to clean the burr grooves.
If the Grain Mill Attachment must be washed, wash it by hand with mild detergent and warm water. Dry the main body thoroughly with a towel. Allow the parts to air dry. If the burrs are not completely dry, grain may clog the Grain Mill Attachment so please wait until next use to reassemble.
Hand held mixers
How long can I run the hand held mixer?
There is no specified limit in running the hand held mixer as it would depend on the load. However, rest assured our motor is tested for regular domestic use, and as always, reasonable care is always recommended!
Why are the blades falling off the blending arm?
Ensure that the blades are locked correctly into the blending arm. Insert the arm into the blade and twist to lock until it clicks.
Are the hand mixer accessories dishwasher safe?
Absolutley! Always remove beaters from hand mixer before cleaning. Wash the accessories in the dishwasher, or by hand in warm, soapy water. Rinse and wipe dry.
What attachments are suited to what ingredients?
Turbo beater - cookie dough & cake batter
Pro whisk - whipped cream, whipped egg whites, sauces & puddings
Dough hooks - yeast bread doughs
Liquid blender rod - smoothies, chocolate milk, iced tea, milkshakes, soups & sauces
What speeds are suited to what ingredients?
Speed 1. Using the turbo beater, for slow stirring, combining, and starting all mixing procedures. Use this speed to stir in nuts, chocolate chips, shredded cheese, olives, and other chunky ingredients.
Speed 2. Using the turbo beater or dough hooks, mix flour and other dry ingredients with liquids or other moist mixtures. Knead yeast dough (bread, pizza dough) with the dough hooks.
Speed 3. Using the turbo beater, mix runny batters, such as pancake or waffle batter.
Speed 4. Using the turbo beater, combine heavy mixtures, such as cookie or biscuit dough.
Speed 5. Using the turbo beater, mix thick dough, such as muffin or cake batter.
Speed 6. Using the turbo beater, blend butter and sugar. Mix frostings.
Speed 7. Using the turbo beater, finish mixing cake and other batters.
Speed 8. Using the pro whisk or the liquid blender rod, whip cream and mousse mixtures.
Speed 9. Using the pro whisk or the liquid blender rod, beat egg white and meringue mixtures.
What are the different attachments for the handmixer?
Our 9 speed hand mixer includes stainless steel beaters, a pro whisk, dough hooks and a liquid blending rod.
How long should I mix my ingredients with the hand held mixer?
This KitchenAid Hand Mixer will beat faster and more thoroughly than most other electric hand mixers. Therefore, the beating time in most recipes must be adjusted to avoid overbeating.
Beating time is faster due to larger beater sizes. To help determine the ideal beating time, observe the batter or dough and beat only until it has the desired appearance described in your recipe, such as "smooth and creamy."
Food chopper
What is the difference between the food chopper models?
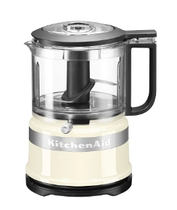
3.5 Cup Mini Food Chopper
- A compact and lightweight mini food processor. Ideal for quick and small processing tasks such as dressings and sauces
- 3.5 cup processing bowl
- Multi purpose stainless steel blade
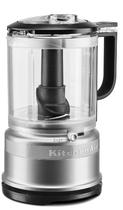
5 Cup Food Chopper
- Quickly prepare dressings and sauces with the food chopper. The additional whisk accessory is perfect for whipping and emulsifying ingredients.
- 5 cup processing bowl
- Multi purpose stainless steel blade
- Whisk accessory
What is the difference between the two speeds on the Food Chopper?
Two speeds provide optimal results, regardless of the task. Use the speed 1 for everyday chopping needs. Use the higher speed 2 to quickly purée ingredients.
For best processing results, press and release the speed 1 or speed 2 button. Do not exceed continuous 30 second maximum run time. Repeat until ingredients reach the desired consistency. Enjoy!
Are coffee beans or hard spices suitable for processing in the Food Chopper?
As amazing as our food choppers are, please do not use your food chopper to process coffee beans or hard spices such as nutmeg. Processing these foods could damage the food chopper.
Are the food chopper bowls BPA free?
Yes, our food chopper bowls are BPA free!
Are the food chopper bowls dishwasher safe?
Yes, you can place our food chopper bowls into the dishwasher, making cleaning up easier than ever!
What is the best way to achieve uniform consistency of processed foods?
For the consistency, cut carrots, celery, mushrooms, onions and other similar vegetables into 2.5 cm pieces before adding to work bowl.
Food processors
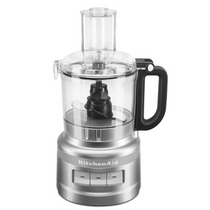
What is the difference between the food processor models?
7 Cup Food Processor
- 7 cup work bowl
- 4 colours available
- Multi purpose blade
- Dough blade
- Processor in bowl adapter
- Reversible medium slicing/shredding disc
- Thick slicing disc
9 Cup Food Processor
- 9 cup work bowl
- 4 colours available
- Multi purpose blade
- Dough blade
- Processor in bowl adapter
- Thin slice/shredding disk
- Medium slice/shredding disc
- Thick slicing disc
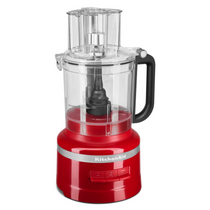
13 Cup Food Processor
- 13 cup work bowl
- Available in white and onyx black
- Multi purpose blade
- Adjustable slicing disc
- Reversible shredding disc
Are the food processor bowls BPA free?
Yes, our food processor bowls are BPA free!
Are the food processor bowls dishwasher safe?
Yes, you can place our food processor bowls into the dishwasher, making cleaning up easier than ever!
What is Externally Adjustable Slicing Control?
KitchenAid’s exclusive externally adjustable slicing disc allows you to adjust slicing thickness from thin to thick, without having to remove the blade assembly. With the slicing disc installed, simply slide the Slicing Thickness Control to the desired setting – no need to remove the cover or even turn off the food processor. Disc is adjustable from approximately 1 mm to 6 mm for slicing most foods.
How do I adjust the thickness?
Simply set the desired slicing thickness by moving the lever to the left for thinner slices or to the right for thicker slices.
Why is liquid leaking from my food processor work bowl?
It is important that the food processor's work bowl is not filled above the maximum liquid level. Filling the work bowl over the maximum liquid level will cause the liquid to go under the blade and out onto the base of the unit. On some models there is a line on the work bowl to indicate the maximum level of liquid that can be processed by the food processor.
Liquids should only be processed with the multipurpose blade. The egg whip should only be used to whip egg whites and cream.
A little tip - if the recipe has high liquid content it is recommended to use the pulsing method to avoid excess leakage!
How do I process meat in the food processor?
With meat and cheese it is recommended you lightly freeze or at least well chill the meat / fish / chicken first, and then off you go!
Where should I store the food pusher?
To prevent damage to the interlock system, always store the food pusher outside of the chute when not in use. Additionally, always store the bowl and lid in an unlocked position so that the activation pins are not engaged. Storing your machine with the food pusher in the chute, and the bowl and lid locked into place means that the interlocking system is constantly engaged and this can wear away over time.
Blenders
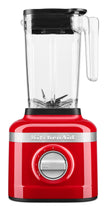
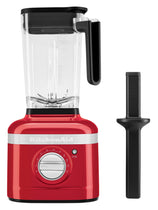
What is the difference between the blender models?
K150 3 Speed Ice Crushing Blender
- 3 colours available
- Variable 11 speeds
- 1L capacity thermal BPA free plastic jug
- Flex edge tamper
- Measuring cup
K400 Variable Speed Blender
- 8 colours available
- 5 speeds
- 1.7L BPA free plastic jug
- Stay put lid with measuring cup
Can I blend hot soup?
We recommend that hot liquids are cooled slightly before blending, always secure the lid correctly and start blending on a low speed then increase slowly.
If you're after an all-in-one, our amazing Pro Line Blender is also designed to make smooth and delicious soups too! You can shop the Pro Line blender here.
Are all blender jugs BPA free?
Yes, our blender jugs are BPA free!
Are the blenders jugs dishwasher safe?
Yes, you can place our blender jugs into the dishwasher, making cleaning up easier than ever!
What should I do if I overload the KitchenAid Blender?
If the blender becomes overloaded when blending heavy ingredients. Unplug the power cord, remove the jug from the base and divide contents into smaller batches. Adding liquid to the jug may also reduce the load on the blender.
A little tip - it helps to put liquids at the bottom of the jug first!
How do I clean the blender jug?
Cleaning your blender is easy, simply follow the steps below:
Put the jug on the blender base, fill half full with warm (not hot) water, and add 1 or 2 drops of dishwashing liquid. Put the lid on the jug, press the STIR speed setting, and run the blender for 5 to 10 seconds. Remove the jug and empty contents. Rinse with warm water until clean.
To clean the lid and ingredient cap, wash in warm soapy water, then rinse and dry thoroughly. These parts can also be washed in the top rack of an automatic dishwasher. For best results, hand washing is recommended. Wipe the blender base and cord with a warm, sudsy cloth; wipe clean with a damp cloth, and dry with a soft cloth. For storage, the cord can be coiled into the cord-wrap on the bottom of the base.
What settings are suited to what ingredients?
Use a lower speed for soft fruits and vegetables and high speed of tougher ingredients. To get the most out of your blender it is important to layer the jug correctly, starting with liquid and softer ingredients and tougher ingredients and ice on top. Happy blending!
What are some top tips to achieve the best results with my blender?
Do's: Keep the lid on the Blender Jar while blending.
Don't:
- Do not remove the Blender Jar from the base while the Blender is running.
- Press down on the lid while blending, as this can cause the coupler to become worn.
- Stop the Blender and unplug before using utensils in the Blender Jar.
- Do not use metal utensils -- they can scratch the jar or damage the blade.
- Blenders are not suitable for beating egg whites, kneading yeast dough, or mashing potatoes.
- Blending hot liquids
- Remove the center ingredient cap before blending warm or hot liquids, and blend using the Low speed or Pulse setting.
- Increase speed if necessary.
- Cool hot foods, if possible, before blending.
- Chopping dry ingredients
- Thorough blending usually requires only a few seconds of operation.
- Be careful not to over-process foods.
- When chopping dry ingredients, make sure the Blender Jar, lid, and blade are completely dry.
How do I crush ice or frozen fruit
- Ice can be crushed or shaved at any speed.
How much ice can be crushed at one time?
- Process up to one standard ice cube tray or 12 to 14 standard ice cubes at a time. No liquid needs to be added for processing.
- Some blenders have an "Ice Crush" feature specifically for this purpose.
- With foods that tend to stick to the jar, use the Pulse feature.
Amount of ice in beverage
- Blend at a High-speed setting if you're making beverages using large amounts of ice.
- For smaller quantities, use a Medium or Pulse setting.
Speeds
- For multiple ingredient mixtures, start the blending process and the Low speed setting to combine the ingredients thoroughly, and then increase to a higher speed if necessary.
- The ingredient cap can be removed and liquid or ice added to the Blender at a Low speed setting.
- When operating the Blender at higher speeds, with a full jar, or with hot contents, stop the Blender before adding ingredients.
Chunk free smoothies
- For a chunk-free smoothie, use the "pulse" or "crush ice" buttons to break up the chunky items first, before progressing to the higher speeds. This allows the chunky items to fall down to the blade to be impacted, which produces a smooth result in less time.
- When using a high speed for smoothies, the ice or fruit does not fall down to the blade, but instead floats around in the middle, so it takes more time to obtain good results.
Hand held blenders
What is the benefit of a DC motor?
A DC motor is a machine that transforms electric energy into mechanical energy in form of rotation, the benefit of a DC motor is that it povides a powerful blending action and is designed for quiet, long-life operation.
What is the pan guard?
The pan guard helps prevent scratching of cookware. The pan guard is a standard inclusion for the Deluxe Hand Blender and Classic Hand Blender.
Are the hand blender accessories dishwasher safe?
Yes, all hand blender accessories are dishwasher safe, making it super easy to clean up!
Kettles
Why does my kettle have stains inside the jug?
Calcium deposits or White Spots may form on the interior metal parts of the kettle. To get the best performance from your Electric Kettle, decalcification will be necessary. The cleaning interval will depend on the hardness of the water you put in the Electric Kettle.
1. Fill the Electric Kettle with 1 cup (0,25 L) white vinegar. Add 3 cups (0,75 L) water. Boil and allow to stand overnight before emptying the solution.
2. Fill the Electric Kettle with water, bring to a boil, and drain out the water. Repeat this step twice. The Electric Kettle is now ready to use.
Why won't my kettle turn on?
Check there is a minimum of 250mls of water in the jug, the kettle will not operate with an insufficent amount of water.
Why is the inside of my kettle brown?
This is a harmless buildup of minerals called limescale. Cleaning the kettle regularly will help keep this away.
Why is water boiling out the top of my kettle?
The jug may be too full, water will boil out of the spout if the jug is too full.Please do not exceed the maximum water fill line.
Why won't my kettle turn on if it is full?
Check there is a minimum of 250mls of water in the jug. Please note the kettle will not operate with an insufficent amount of water.
What is the difference between the kettle models?
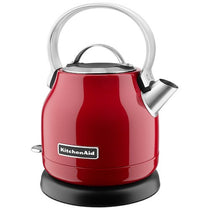
Artisan 1.25L Kettle
- 4 colours available
- 1.25L capacity
- Quickly boils water with a compact footprint
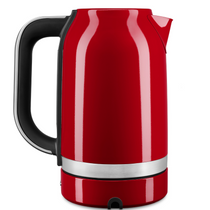
1.7L Variable Temperature Electric Kettle
- 3 colours available
- 1.7L capacity
- 6 settings to heat water to your desired temperature from 50°C to 100°C
Can I control the temperature of the water in my kettle?
Models KEK1722, KEK1522, KEK1835 all have variable temperature controls. Choose your desired temperature from 50˚C to 100˚C. The perfect kettles for tea lovers.
How do I clean my kettle?
1. Fill the Electric Kettle with 1 cup (0,25 L) white vinegar. Add 3 cups (0,75 L) water. Boil and allow to stand overnight before emptying the solution.
2. Fill the Electric Kettle with water, bring to a boil, and drain out the water. Repeat this step twice. The Electric Kettle is now ready to use.
Why won't my kettle turn on?
Check there is a minimum of 250mls of water in the jug. Please note the kettle will not operate with an insufficent amount of water.
Toasters
Why is my toast burning?
No one loves burnt toast! Different breads require different heat settings. Raisin bread and bread with a high sugar content require a lower toasting setting than traditional white bread. Our suggested setting is 1-2 (low).
Toasting continuously may also cause bread to burn, with every 3-4 toasting cycles lower the toaster setting.
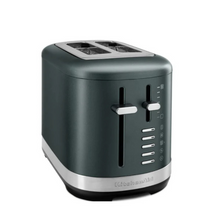
What is the difference between the toaster models?
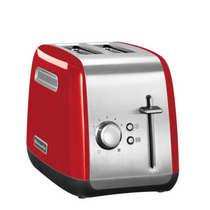
2 Slice Toaster
- 3 colours available
- 5 shade settings
- Multi function - Keep warm, crumpet, defrost, and reheat
- Features a high lift lever which is convenient for removing smaller pieces of bread
2 Slice Toaster
- Available in 8 colours
- 7 shade settings
- Multi function - Keep warm, crumpet, defrost, and reheat
- The long and wide slots are perfect for artisan breads
- Features a high lift lever which is convenient for removing smaller pieces of bread
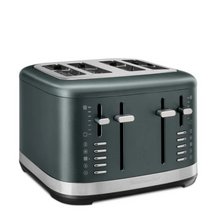
4 Slice Toaster
- 8 colours available
- 7 shade settings
- Long, extra wide slots
- Multi function - Bagel, reheat, defrost and “a little longer“
- Features a high lift lever which is convenient for removing smaller pieces of bread
How do I clean my toaster?
Wipe the toaster with a soft, damp cotton cloth. Please do not use paper towels, abrasive cleansers, or liquid cleaning products and do not immerse the toaster in water.
To clean the crumb tray press and release the center of the crumb tray then slide it out. Shake the crumbs into a waste container. It is recommended that the crumb tray be emptied after each use. The crumbtray can be washed in the top rack of a dishwasher.
What type of breads can I put in my toaster?
Many of our toasters have wide slots and are suitable for crumpets, muffins, bagles and all types of bread. Our Design collection toasters are long slot toasters and are suitable for longer artisan breads.
How does the settings relate to the colour of the toast?
Our toasters have 7 shade settings. 1 being the lightest shade and 7 being the darkest. Please note that different breads require different heat settings. Raisin bread and bread with a high sugar content require a lower toasting setting than traditional white bread.
Fully Automatic Espresso Machine
What kind of espresso drinks can you make with the Fully automatic espresso machines?
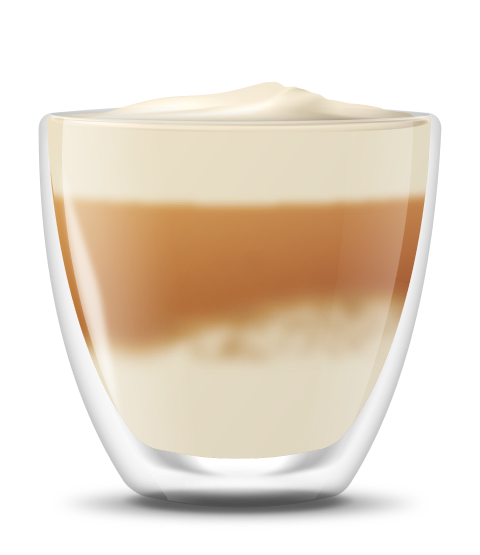
Fully automatic espresso machines (KF6, KF7, KF8 models) have a list of recipe options for you to choose from — so you can tap in your choice on the screen and have the drink made.
As well as Espresso of 1 or 2 shots, there are taller drinks, lots of popular milky coffees and even some alternatives. Here you can find a full list of all the possible drink options on our 3 Fully automatic espresso machines.
Fully automatic espresso machine KF6
| 15 recipe options | 1 shot | 2 shots |
|---|---|---|
 Espresso Espresso | ✓ | ✓ |
 Coffee Coffee | ✓ | ✓ |
 Americano Americano | ✓ | ✗ |
| Latte Macchiato | ✓ | ✓ |
 Macchiato Macchiato | ✓ | ✓ |
 Cappuccino Cappuccino | ✓ | ✓ |
 Caffe Latte Caffe Latte | ✓ | ✓ |
 Hot water Hot water | ✓ | ✗ |
 Warm milk Warm milk | ✓ | ✗ |
Fully automatic espresso machine KF7
| 20 recipe options | 1 shot | 2 shots |
|---|---|---|
| Espresso | ✓ | ✓ |
| Espresso lungo | ✓ | ✓ |
| Coffee | ✓ | ✓ |
| Americano | ✓ | ✗ |
| Latte Macchiato | ✓ | ✓ |
| Macchiato | ✓ | ✓ |
 Flat white Flat white | ✓ | ✓ |
| Cappuccino | ✓ | ✓ |
| Caffe Latte | ✓ | ✓ |
| Cortado | ✓ | ✓ |
| Hot water | ✓ | ✗ |
 Frothed milk Frothed milk | ✓ | ✗ |
| Warm milk | ✓ | ✗ |
Fully automatic espresso machine KF8
| 40+ recipe options | 1 shot | 2 shots | 1 shot with Plant based drink | 2 shots with Plant based drink |
|---|---|---|---|---|
 Ristretto Ristretto | ✓ | ✓ | ✗ | ✗ |
| Espresso | ✓ | ✓ | ✗ | ✗ |
 Espresso lungo Espresso lungo | ✓ | ✓ | ✗ | ✗ |
| Coffee | ✓ | ✓ | ✗ | ✗ |
| Americano | ✓ | ✗ | ✗ | ✗ |
 Latte Macchiato Latte Macchiato | ✓ | ✓ | ✓ | ✓ |
| Macchiato | ✓ | ✓ | ✓ | ✓ |
| Flat white | ✓ | ✓ | ✓ | ✓ |
| Cappuccino | ✓ | ✓ | ✓ | ✓ |
 Café au lait Café au lait | ✓ | ✓ | ✓ | ✓ |
| Caffe Latte | ✓ | ✓ | ✓ | ✓ |
| Cortado | ✓ | ✓ | ✓ | ✓ |
| Hot water | ✓ | ✗ | ✗ | ✗ |
 Green tea Green tea | ✓ | ✗ | ✗ | ✗ |
| Frothed milk | ✓ | ✗ | ✓ | ✗ |
| Warm milk | ✓ | ✗ | ✓ | ✗ |
What is the brew temperature setting for Low, Medium and High?
The optimal water temperature for brewing espresso ranges from 189–205°F (87–96°C).
The KitchenAid Espresso Machines temperature levels (Low-Medium-High) give the ability to adjust within this range, tuning the temperature approx. of +/- 2°C to 5°C, depending on many factors such as grind size, dose, roast and freshness of the coffee.
What are the heating elements made of?
The heating elements are made of aluminum and have stainless steel tubing.
Why is the removable bean hopper important?
KitchenAid Fully Automatic Espresso machines are designed to encourage exploration. Simplifying the way to change beans is an important benefit to exploring different roasts and coffees.
What does it mean that this machine has an alternative milk cycle?
The Plant Based Milk Cycle from KitchenAid is programmed to understand the differences between Plant Based beverages and traditional Dairy milk, adjusting the amount of air and steam to different milks fat & protein contents, to provide a creamy, stable milk foam. Plant based beverages typically have less fat and protein than traditional dairy milk. Therefore, more air is needed at the start of the steam process to produce a creamy, stable foam. KitchenAid’s unique Alternative Milk Option has the the ability to produce a foamy milk from common plant based milks - like Oat, Almond, Soy and Coconut - at the touch of a button
Are water filters included with my purchase where can I buy additional filters when needed?
A water filter is included with each machine. Additional filters will be available through KitchenAid website.
How often do water filters need to be replaced?
KitchenAid advises replacement of the water filters every 50L of water or every 6 weeks.
Semi Automatic Espresso Machine with Burr Grinder
What is the difference between single- and double-wall portafilter baskets?
Double-wall, pressurized baskets help reduce extraction variability, ideal for beginning baristas. Single-wall baskets give the user greater control for full-bodied shots.
How much ground coffee do I need to put in KitchenAid espresso machines filter baskets:
Here's a quick guide:
- Single Wall, 1 Shot: 10-12g use for freshly ground whole beans.
- Single Wall, 2 Shot: 18-20g use for freshly ground whole beans.
- Double Wall, 1 Shot: 10-12g use for pre-ground coffee, novice users.
- Double Wall, 2 Shot: 18-20g use for pre-ground coffee, novice users.
Can I use coffee pods in this model?
No. Coffee pods cannot be used with this model.
What is the brew temperature setting for Low, Medium and High?
The optimal water temperature for brewing espresso ranges from 189–205°F (87–96°C). The KitchenAid Espresso Machines temperature levels (Low-Medium-High) give the ability to adjust within this range, tuning the temperature approx. of +/- 2°C to 5°C, depending on many factors such as grind size, dose, roast and freshness of the coffee.
What are the heating elements made of?
The heating elements are made of aluminum and have stainless steel tubing.
What is a PID Temperature Control on an espresso machine?
PID actually stands for Proportional Integral Derivative. In terms of coffee, it simply means that the espresso machine is capable of constantly monitoring the water temperature and making small adjustments to keep it at the set temperature. Without a PID controller, an espresso machine works a lot like a thermostat. Once the temperature drops to a certain threshold, the water will heat back up to the set temperature. This makes fluctuations in water temperature much more constant. A PID ensures temperatures in an espresso machine are consistent. With greater consistency in temperature comes greater overall consistency in the quality of the espresso, from texture to taste.
How hard should I tamp when making espresso?
When you tamp the ground coffee, you need to do it firmly and uniformly for the best results, at a pressure of 15-20kg / 30-40lb to create a bed of coffee with an even density. This allows the water to flow evenly through the entire mass of pressed coffee to create the best taste. Note: the portafilter on our Espresso machine has a unique flat base, which promotes a level tamp and minimises water channeling. It's designed to give you control.
How to program espresso water temperature and water hardness?
Our Espresso Machines come with programmable features. Here's how to program them…
- To change pre-programmed water temperature
- Toggle the Mode Button to select Espresso, press and hold for 3 seconds.The indicator lights will show the default factory setting or previous saved setting (see Indicator light chart for reference).Toggle the Mode Button between Low-Mid-High to select desired temperature.To save your selection, press the Start/Cancel button or wait for 10 seconds.
- To change pre-programmed water hardness
- Toggle the Mode Button to Water, press and hold for 3 seconds.The indicator lights will show the default factory setting or previous saved setting (see Indicator light chart for reference).Toggle the Mode Button between Low-Mid-High to select desired water hardness. To save your selection, press Start/Cancel button or wait for 10 seconds.
How to program the quantity of espresso and hot water?
- To change pre-programmed Espresso Volume for 1 / 2 shots
- Toggle the Mode Button to select Espresso. Select the dose you desire to programme (1 or 2). Press and hold the Start/Cancel Button until the desired espresso amount is reached in your cup. While programming your selected dose, the Dose and the Start/Cancel button lights will blink. These lights will stop blinking when programming is complete.
- To change pre-programmed Water Volume for 1 / 2 shots
- Toggle the Mode Button to select Water. Select the dose you desire to programme (1 or 2). Press and hold the Start/Cancel Button until the desired water amount is reached in your cup. While programming your selected dose, the Dose and the Start/Cancel Button light will blink. These lights will stop blinking when programming is complete.
How to make perfect microfoam milk?
Microfoam is the silky smooth milk foam with small, uniform bubbles that we associate with many espresso-based drinks. Here's how to froth milk:
- Start with cold milk and a cold pitcher (jug)
- Purge your steam wand to get rid of any residual water or build-up
- Fill the pitcher to 1cm below the start of the spout
- Submerge the tip of the steam wand just below the surface of the milk and froth until the milk almost doubles in volume. This step is called “aerating” or “stretching”.
- Make sure the tip of the wand is near the surface of the milk, because it needs to draw air from the milk’s surface to produce the froth.
- Once the milk has doubled in volume, lower the steam wand into the milk, tilting the pitcher to obtain a vortex in the milk, until the pitcher is almost too hot to hold. This step is called “texturing”.
- Gently swirl the milk in the pitcher and tap against the counter to release any bubbles.
- When foamed, the milk is ready to pour.
- Remember to purge and clean the steam wand once finished!
Why is purging water important?
Temperature is important for consistent extraction. Just a couple of degrees difference can under-extract your espresso, leading to a sour taste. Flushing the grouphead before pulling a shot will ensure the machine components are at the proper temperature.
How do I know when to clean the Espresso Machine?
The “Clean me” indicator is programmable for varying water-hardness levels and alerts you when the espresso machine requires a cleaning cycle.
How do I clean the parts and exterior of the Espresso Machine?
Exterior of machine should be wiped down with a clean, soft, damp cloth. Removable accessories can be soaked and washed in warm soapy water and rinsed clean. The steam wand should be cleaned after every use by selecting Water mode and flushing for 3-5 seconds, then wipe with a soft damp cloth. Complete details are in the Use & Care Guide.
Burr Grinder
Why should I use a burr grinder instead of a blade grinder?
Burr grinders provide a uniform grind for even extraction. The KitchenAid® Burr Grinder allows you to choose from 70 precise grind-size settings to achieve the ideal size for each brew method, from French Press to Espresso. A blade grinder can not produce the fine, even grind required for Espresso.
Which burr grinder setting should I use?
Setting the right grind size depends on the type of coffee you’d like to make. As coffee brews, all the flavours are released from the grounds as they come into contact with hot water. This is called extraction. The coffee grind size determines the speed at which extraction happens, which in turn affects the taste, aroma, texture and the end result. Coarse grinds let water through quickly, and have less surface area to extract flavours from. This means the water needs longer to bring the goodness out. A fine grind is packed tighter and has a larger surface area, so needs less time in contact with the water. So, brew methods with a short brew time, like espresso, need a fine grind – and longer brews, such as French press, need a coarser one. Our burr grinder (coffee grinder) has 70 grind settings to experiment and fine tune the grind size, to find the one that suits your brew method, and your taste.
What does “No mess Ion Generator” mean?
The KitchenAid Semi-Automatic Espresso machine with Burr Grinder has an anti-static technology, that helps reduce static charge so coffee grounds won't make a mess of the countertop, to enjoy a clean grinding experience.
Warranty, repairs and spare parts
How can I check the warranty policy for my product?
Is my warranty valid if I bought outside of Australia?
Only purchases through one of our approved stockists are covered under warranty. KitchenAid products purchased outside Australia and New Zealand are unfortunately not covered under warranty.
Do I need to register my product so my warranty is valid?
If you have purchased directly on KitchenAid.com.au
Great news, you don't need to register your product as this will automatically be done for you during your online ordering process!
If you have purchased through one of our trade/retail partners
Yes, you will need to register your product to validate your warranty via our Register My Product page located here.
Can I buy spare parts for my product?
Yes, you can purchase spare parts for your products by contacting our Customer Service team by calling 1800 990 990 or by completing the Contact Us form located here.
Where can I buy replacement parts for my product?
You can purchase replacement parts for your products by contacting our Customer Service team by calling 1800 990 990 or by completing the Contact Us form located here.
Where can I get my product repaired?
To find your nearest service centre, please visit our Service Centre & Stockists page here.
What is a premium service centre?
Premium service centres are our most recommended service providers.
There is oil leaking from my stand mixer
Occasionally, you may see a few drops of oil in the bottom of the stand mixer bowl, oil dripping off the beater shaft, or oil leaking out of the lock lever or Speed Control slots on a mixer that has been turned on its side during shipping or storage. The reason for this is that the mixer is packed with enough solid grease to last the lifetime of the mixer. When the mixer is used, the grease is distributed around the gears to lubricate them.
Over time some oil can separate out of the solid grease and will naturally settle to the lowest point in the motor-head which is just over the beater shaft if the mixer is upright or the Speed Control or lock lever slots if the mixer is on its side. This is more likely to happen in warm weather and if the mixer is not used very often.
Using a mixer regularly may prevent this from occurring.
You can also turn the mixer on without any ingredients in the bowl periodically to help prevent this.
If you have not used your mixer for a while, you can turn it to speed 10 and let the unit run for 2 minutes, prior to use.
At the end of 2 minutes, turn off the mixer and wipe any excess oil from around the planetary action.
Some oil could splatter and get on clothing during this process, so if you have a pouring shield, it may be helpful to have it attached to the bowl to try to reduce the likelihood of this happening.
The grease is non toxic and because it is not a food or a drug, it is NOT FDA approved. However, it is a food grade grease approved to come in contact with food. There is no safety issue with incidental contact with food prepared in the mixer, although it may discolor light colored frostings or mashed potatoes.
Payment and technical support
My payment has been declined
Please double check that all payment details you have entered are all correct.
If the problem persists, please contact your card issuer for more information.
I am not sure if my payment went through, how can I check?
If you have been redirected to a new page with the below message
Your order is confirmed. You’ll receive a confirmation email with your order number shortly.
Your payment has gone through and your order is now with us for fulfillment.
Alternatively, you may check your bank statement or contact your card issuer for more information.
Can I change or cancel my order?
Unfortunately once your order has gone through you will be unable to cancel or change your order. If there is an issue with your order such as delivery details, please call us on 1800 990 990.
What do I do if I haven't received my order confirmation email?
Once your payment has gone through and you have received the Order Confirmation screen on your browser, you will be sent a confirmation email shortly after.
If you are unable to locate this email in your inbox, please check your junk or spam folder.
Please allow up to 3 hours for your confirmation email to come through. If you have checked all folders and still have not received your order confirmation email, please contact us here.
What payment methods do you accept?
We currently accept the following payment methods:
- Visa
- Mastercard
- Zip Pay
- KitchenAid digital gift cards
Please note we are working hard to provide you with more payment options in the near future!
How do I use my giftcard online?
Once you have reached the checkout page, please complete the "Add a gift card section" by adding in your gift card number and your PIN, and press "Apply". The amount available will then be deducted from your cart.
What is Zip Pay?
Zip Pay is a credit and payment solutions allowing people to own the things they love now, and pay later, interest-free.
Zip Pay works like an account. For all purchases, you make during a month you receive a statement with your closing balance on the 1st day of the following month. You have until the end of the month to pay off your balance for the account to remain fee free. For more information, please visit the Zip Pay website here.
Can I return my Zip Pay order?
If you have any issues with your order or product, please contact our Customer Service team here. Please note we currently do not have a returns policy in place and our teams are working to have this in the near future.
What happens if I miss a Zip Pay payment?
If you don't meet your minimum monthly repayments within 21 days after the Due Date, a $5 late fee will be added to your account. For more information, please visit the Zip Pay website here.
Who do I contact if I have any questions about Zip Pay?
For any questions regarding Zip Pay specifically, how it works and including details around your account, please contact Zip Pay directly as they will be in the best position to help with your enquiry.
To contact Zip Pay, please click here.
Recipes and staying in touch
Where can I find recipes that I can make using my product?
Discover new meal ideas and baking recipes. From cakes, cookies, snacks, desserts and drinks explore our delicious recipes here. We've made it easier for you to search your favourites! Filter the recipes by products used, occassion or meal category.
How can I stay in touch with KitchenAid on social media?
How do I sign up to receive KitchenAid emails?
To be the first to hear about our new products and exclusive offers, please subscribe to our email newsletter here or follow us on Instagram here, so we can keep you updated!
No results found. Please try different keywords.


